Prompt to code in Xcode with Claude 3.

There have been rumors that Apple may launch a Copilot for Xcode, though no official plans have been shared publicly yet. In the meantime, we can easily expand Xcode’s capabilities and integrate AI into our workflows through extensions, leveraging existing large language models like the newly released Claude 3 from Anthropic. 🚀
In this guide, I’ll show you how to make an Xcode extension and use Claude to generate code based on a given design requirement. We’ll also learn how to write good prompts using Anthropic’s prompting guidelines.
The result will look like this…
To get started:
Step one is to create a macOS app — this is critical, as the app will contain your Xcode extension. While Xcode extensions have a relatively straightforward creation process once you understand it, the setup can be confusing for first-time creators.

After entering your project details, hit next and name and save your new macOS project.
Step 2, add a new target inside the project, and select the Xcode Source Editor Extension template.


Hit next and give your new extension target a name — you may want to follow the format “[YourAppName]Extension”.
For example, if your app is called “XcodeAI”, name the target “XcodeAIExtension”. Once created, Xcode will prompt to activate the target — say yes.
Step 4: Navigate to the target’s General settings tab. Change the “Do not embed” status for the XcodeKit framework to “Embed & Sign”.

Now that you’ve created a source code editor extension, we will start coding commands. But first, let’s import the open-source Swift Package to interact with Anthropic’s API.

Before you can make network calls within the Xcode extension, it’s very important to check the “Outgoing Connections (Client)” option in the Signing & Capabilities section of the extension target.

Now navigate to the project navigator, and you will see that two classes have been auto-generated.

The SourceEditorExtension is a class that conforms to XCSourceEditorExtension. Its main purpose is to handle any initial configuration your extension may require upon launch and to contain the command definitions.
class SourceEditorExtension: NSObject, XCSourceEditorExtension {
    /*
    func extensionDidFinishLaunching() {
        // If your extension needs to do any work at launch, implement this optional method.
    }
    */

    /*
    var commandDefinitions: [[XCSourceEditorCommandDefinitionKey: Any]] {
        // If your extension needs to return a collection of command definitions that differs from those in its Info.plist, implement this optional property getter.
        return []
    }
    */
}
The second class conforms to XCSourceEditorCommand In this case it is called SourceEditorCommand but you can name it as you want but remember to use that same name in the command definition. This is where we will execute the network request to Claude, using the XCSourceEditorCommandInvocation passed as a parameter. I won't go into too many details about the APIs available in XcodeKit but will show you how to use them, for more visit their documentation. (I will also leave some great resources at the end of this post).
class SourceEditorCommand: NSObject, XCSourceEditorCommand {

    func perform(with invocation: XCSourceEditorCommandInvocation, completionHandler: @escaping (Error?) -> Void ) -> Void {
        // Implement your command here, invoking the completion handler when done. Pass it nil on success, and an NSError on failure.

        completionHandler(nil)
    }

}
Let's go step by step:
1- We need to define our command, you need to follow this structure. This can also be done in the info.plist but I find this easier.
Inside SourceEditorExtension lets:
class SourceEditorExtension: NSObject, XCSourceEditorExtension {

    /*
    func extensionDidFinishLaunching() {
        // If your extension needs to do any work at launch, implement this optional method.
    }
    */

   var commandDefinitions: [[XCSourceEditorCommandDefinitionKey: Any]] {
      [
         [
            .classNameKey: "XcodeExtensionTutorialExtension.AskClaudeCommand",
            .identifierKey: "jamesRochabrun.XcodeExtensionTutorial.XcodeExtensionTutorialExtension.AskClaudeCommand",
            .nameKey: "Ask Claude",
         ],
      ]
   }
}
2- We will create now the command, we will call it `AskClaudeCommand`
class AskClaudeCommand: NSObject, XCSourceEditorCommand {

}
3- Let's import SwiftAnthropic and create a service instance:
import SwiftAnthropic
import Foundation
import XcodeKit

class AskClaudeCommand: NSObject, XCSourceEditorCommand {

   let service: AnthropicService = AnthropicServiceFactory.service(apiKey: "MY_API_KEY")

   func perform(
      with invocation: XCSourceEditorCommandInvocation,
      completionHandler: @escaping (Error?) -> Void )
      -> Void
   {
/// Our code.
   }
}
4- Now that we have a service, we need to develop a method to access the code snippet we wish to send to Claude. XcodeKit provides everything we need in XCSourceEditorCommandInvocation. This class contains all the content of a source file as well as any selection made with the cursor. You can see that the invocation contains a buffer of type XCSourceTextBuffer:

The buffer contains all the relevant information from a source file.

We will retrieve the user’s selection from this buffer to send it to Claude, and then update the lines in the source file with the new code. For source code manipulation, we will use utilities I created, which I won’t provide in this tutorial due to its potential to become very extensive. I might create a new blog post about that later, or you can follow some online tutorials, like this one or this one.
5- Prompting is likely the most exciting part of this tutorial. Creating a good prompt with clear details is key to getting the desired output. Let’s dive into Anthropic’s prompting recommendations.

As you can see, this framework enables us to craft effective prompts by providing the model with context, clear instructions, and examples.
Let's create one for our code generation assistant.
let designRequirement = "THE_PROVIDED_DESIGN_REQUIREMENT_PROMPT"

let systemPrompt = "Act as a staff iOS engineer, specializing in SwiftUI and prototyping, capable of creating SwiftUI components and code from provided design descriptions"

let userPrompt =
     """
      Develop a functional, production-ready prototype in SwiftUI according to design requirements defined within XML tags.

      Ensure your code is error-free and ready for compilation at all times..

      Structure the code for seamless integration into an existing project, ensuring that all variables, views, and data models are appropriately defined, including sample data if necessary.

      Include necessary imports and ensure the code is compatible with the latest version of SwiftUI.

      Ensure the code adheres to Swift best practices for readability, as well as SwiftUI best practices for optimal performance and maintainability

      Test the code snippet using Xcode Preview to enable designers to see the result immediately.

      If the design includes images make sure to use SF symbols to populate images as placeholders.

      <design_requirement>\(designRequirement)</design_requirement>

    """
As you can see, we are embedding the design requirement into the prompt while providing clear instructions and explaining the desired output and format.
You can find more information about prompting on their website. If your prompt doesn’t work as expected at first, don’t get discouraged. Prompt tuning is a process that involves iteration and testing.

6- Now is the time to make a request passing the prompt above. We are going to use my open-source library SwiftAnthropic, you can check this tutorial for details on how to use it!
func perform(
  with invocation: XCSourceEditorCommandInvocation,
  completionHandler: @escaping (Error?) -> Void )
  -> Void
  {
// Retrieve the code snippet from the invocation.
    let code = Utils.selection(from: invocation)?.formattedSelection ?? "NO SELECTION"

// Construct the prompt.
      let prompt = /// the userPrompt interpolating the code as I showed previously

      do {
         Task {
            do {
// Define the parameters.
               let parameters = MessageParameter(
                  model: .claude3Opus,
                  messages: [.init(role: .user, content: userPrompt)],
                  maxTokens: 2000,
                  system: systemPrompt)

//  Make a request to SwiftAnthropic Service.
               let result = try await service.createMessage(parameters)

//  Parse the text response
               let messageTextResponse = result.content.first?.text ?? ""

//  Update the source code file.
               Utils.addInSourceCode(messageTextResponse, in: invocation)

               completionHandler(nil) // We call this to reflect the changes on the source file.
            } catch {
               completionHandler(error)
            }
         }
      }
   }
With this setup, you are ready to test your AI Extension!
Run the Xcode Extension target:

You will see a window asking you where you want to run your extension, select Xcode.

A new window will show up to ask you which project you want to use. Select the one you want.

Your project will be opened in a new Xcode, you will see that the Xcode icon has an identifier like this:

The Xcode version with the identifier is where you can test the extension.
Now you can test your new extension, it will look like this!
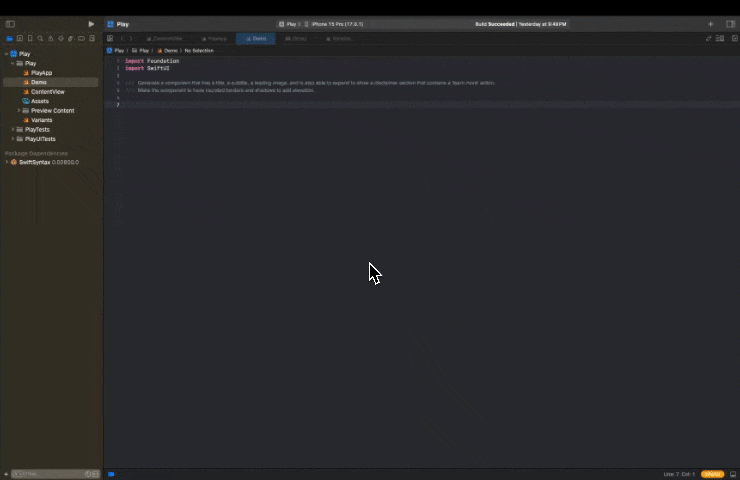
In this example, I am asking Claude 3 Opus to generate:
Generate a component that has a title, a subtitle, and a leading image, and is also able to expand to show a disclaimer section that contains a ‘learn more’ action. Make the component have rounded borders and shadows to add elevation.
Resources: